Time to read: 3 min
When you set out to prototype a new hardware product design, it might seem like there are an overwhelming number of features to test and develop. You want your product to be the best it can be, but the path to get there from a great idea isn’t always clear.
While prototyping hardware is a difficult and complex journey, the fundamental objectives can be boiled down to the following steps:
- Test form
- Test function
- Test material
- Test production
By understanding these 4 key design objectives, you can develop a clear roadmap to help you go from your great idea to a successful product that looks and works as you envision.
1. Test Form
The most basic, but arguably the most significant objective of hardware prototyping, is to represent the form of your design. In this phase, ask yourself:
- How does your design look in physical space?
- How does it feel in your hand?

By developing physical prototypes you can touch and look at in a real world context, you’ll be able to effectively evaluate your product’s dimensions, scale, and aesthetics.
2. Test Function
It’s important to test the function of your product with multiple prototypes. Here, ask yourself:
- Does this prototype behave the way I expected it to?
- If not, why?
This can be a difficult phase of development, especially if there are moving mechanical features in your product. Getting the tolerances just right on your assembly is crucial for correct function.
Hinges, snaps, gears, and user interfaces are some of the features that need to be prototyped to test functionality.
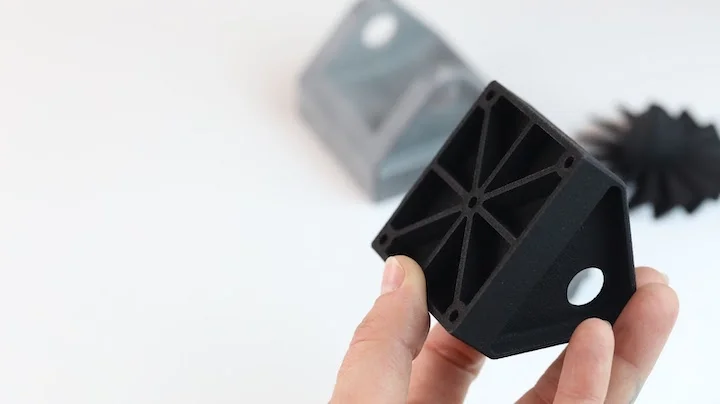
3. Test Material
Materials science is a fascinating topic that we won’t delve into here, but long story short: your product’s success depends on the materials it’s made of. In this phase, ask yourself:
- Does the material I chose live up to my expectations?
- How does it look and feel?
- How does this material add to or hinder functionality?
- Does the part need extra strength or flexibility?

By testing out different materials, you can effectively consider and evaluate each material’s suitability for your product.
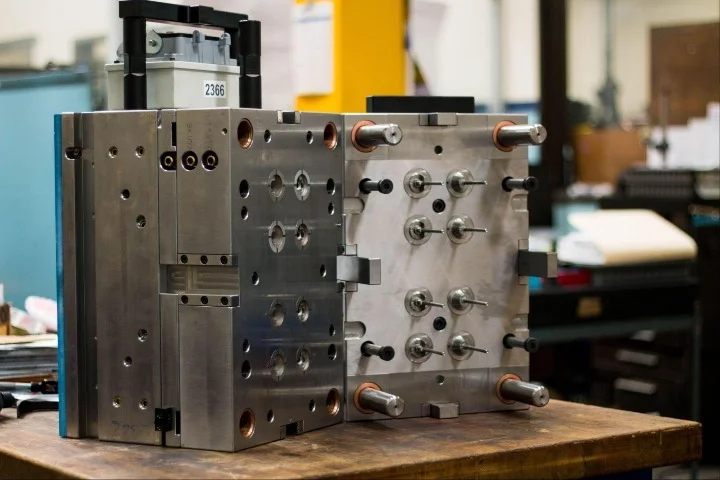
4. Test Production
After you’ve determined the best form, function, and material for your product, the final question you need to ask yourself is:
- How will my product be manufactured at scale?
Production, or manufacturing, involves 2 main parts:
- Fabrication
- Assembly
When you actually test out the assembly of your product, you might realize that those #0-80 screws you chose are pretty tiny (read: impossible to screw in). Or maybe you realized your product can be assembled more than one way!
For fabrication, unless you’re developing a niche or boutique product, you probably want to sell more products than you can manufacture yourself. So finding a manufacturer that meets your quality expectations and quantity needs for a reasonable price is critical.
Testing out your production processes while design changes can still be made may save your product from failure.
Now you have a foundational understanding of the major steps you need to move through in order to successfully prototype your hardware product. A typical mistake of startups, however, is to not budgeting enough time and resources to cover all these prototyping steps. So be sure to allocate a prototyping budget at the beginning of this journey—your customers will thank you in the end!