Ever wish you could jump into a video game and see what that world is like? Well, we’ll do something even better—we’ll get into a video game controller and see what’s inside! We’re tearing down the original Xbox controller and the newer Xbox One controller, to see how the device has evolved.
The Original Xbox Controller
Get your #tbt and #flashbackfriday hashtags ready, because we’re taking it back to 2001, when the very first Xbox debuted. For reference, that’s the same year Wikipedia launched (thank goodness!).
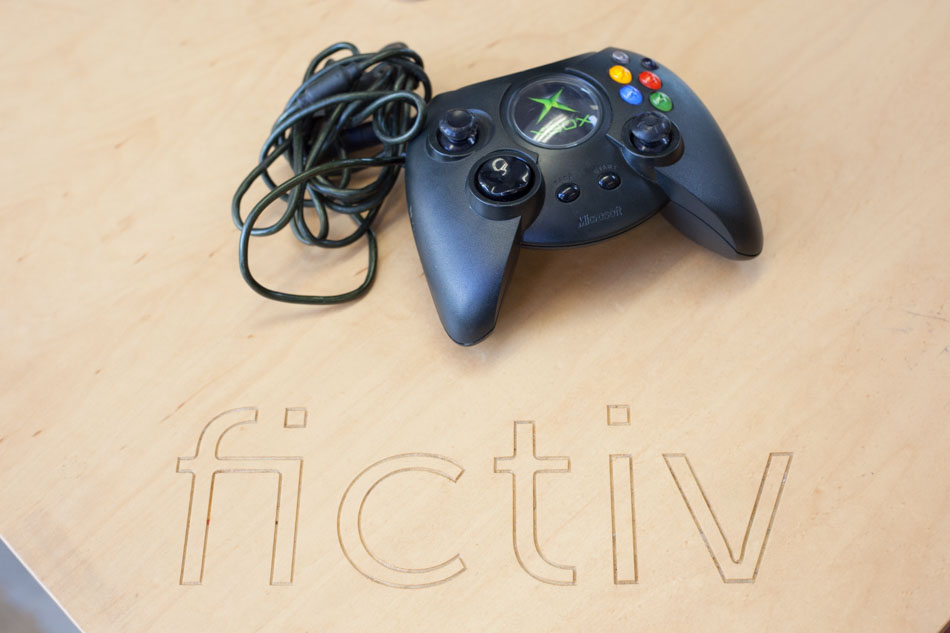
Starting with first impressions of the Original Xbox controller, it’s a lot bulkier than the latest generation. It was nicknamed “Fatty” and then later “Duke” when it came out—we can see why. And get this, it has a cord. Back to the days when things were plugged in!
Getting inside the controller was very easy—the housing was secured by Phillips self-threading screws, and it took little effort to pull apart.
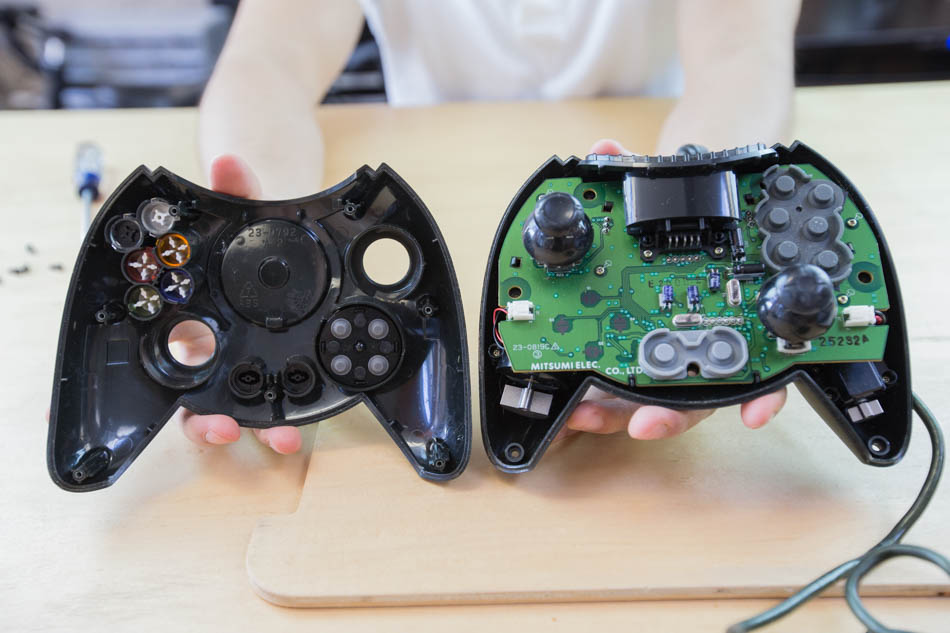
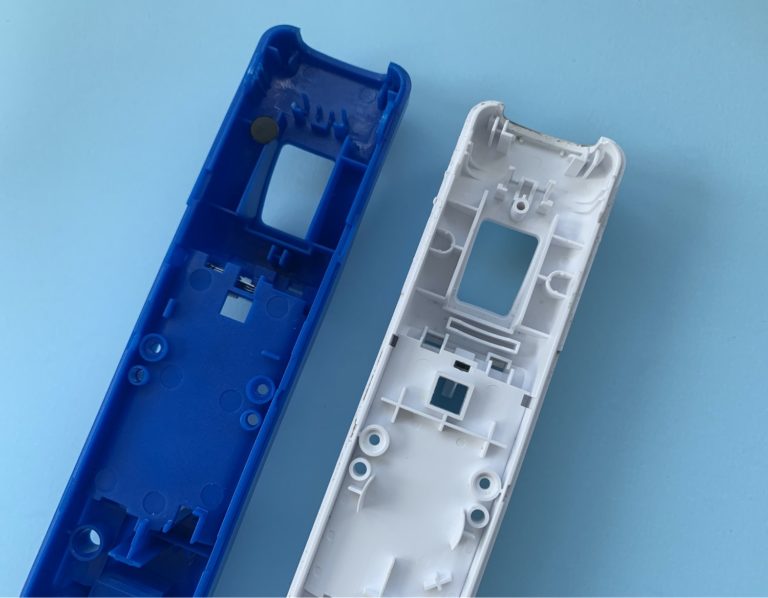
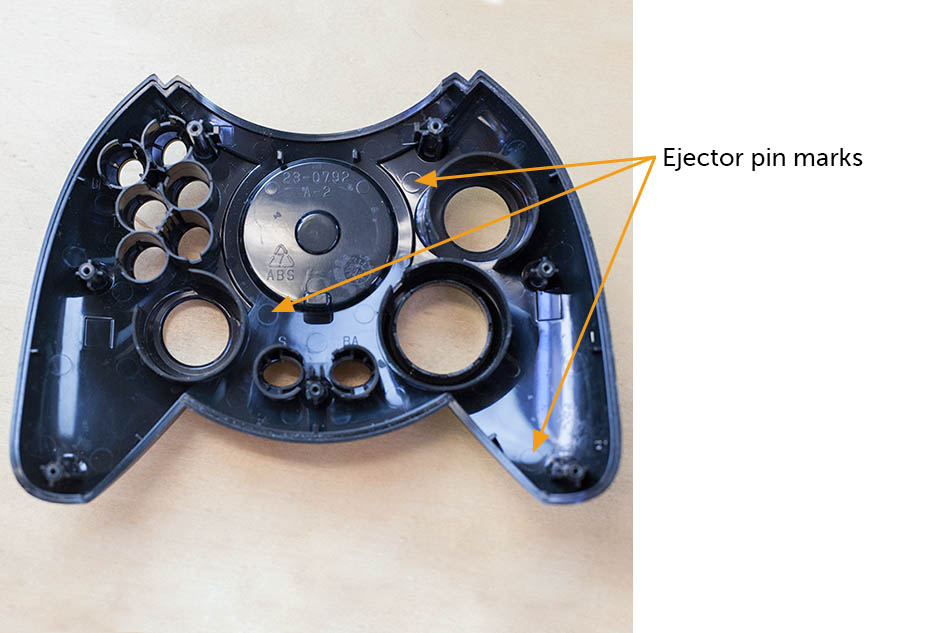
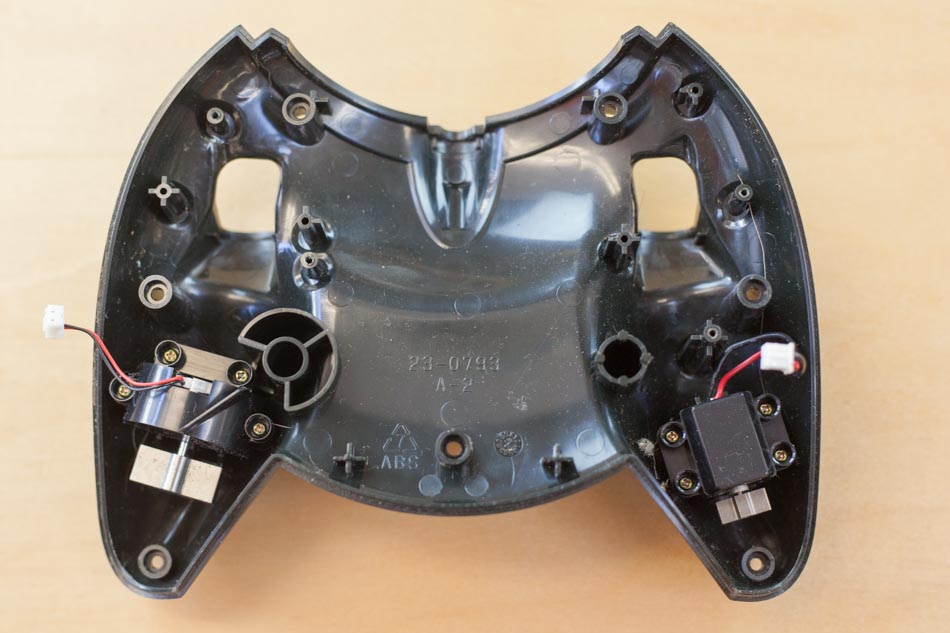
The top cover is an injection molded ABS shell. How nice of Microsoft to identify the material for us (under the recycling mark)!
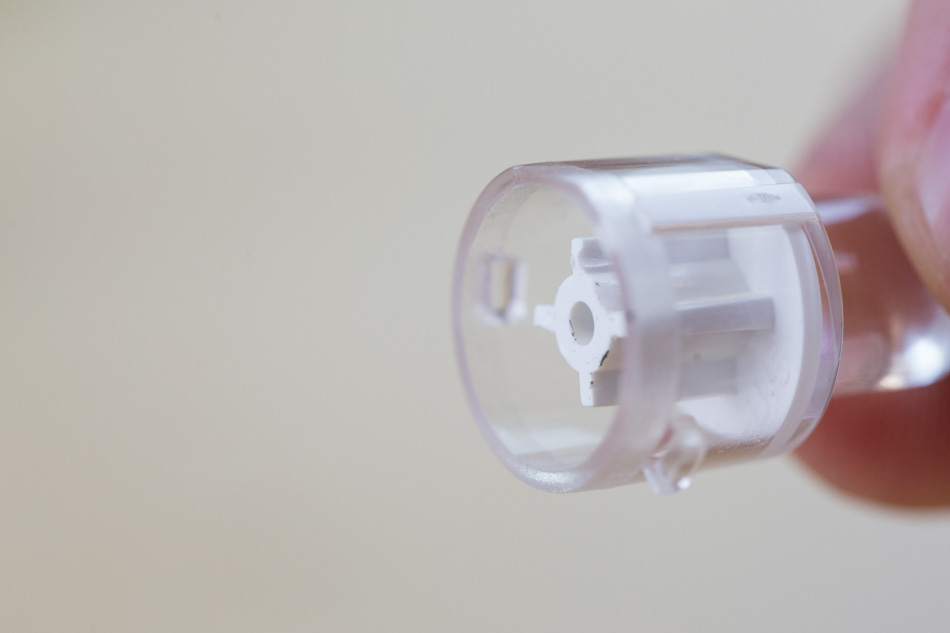
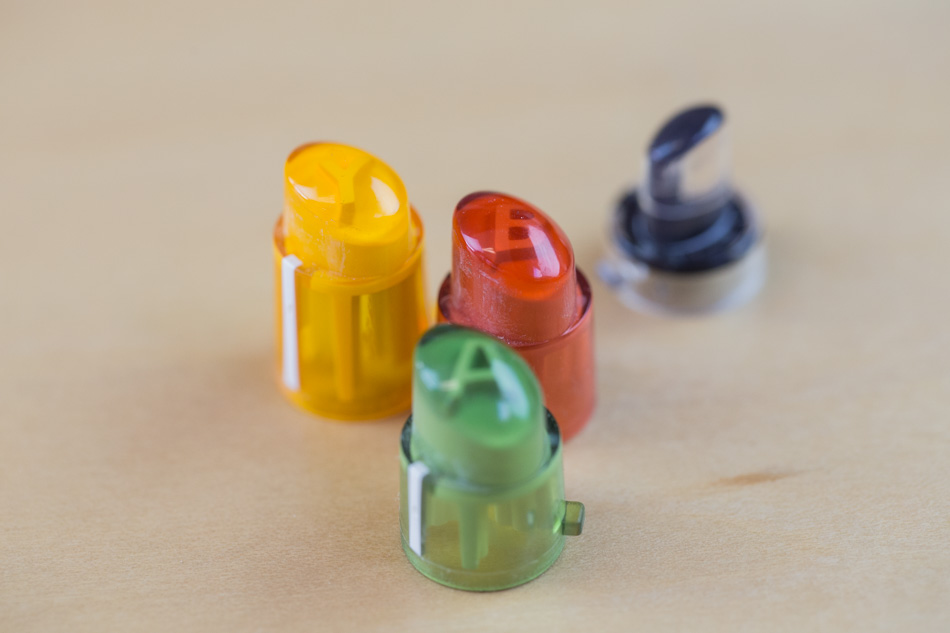
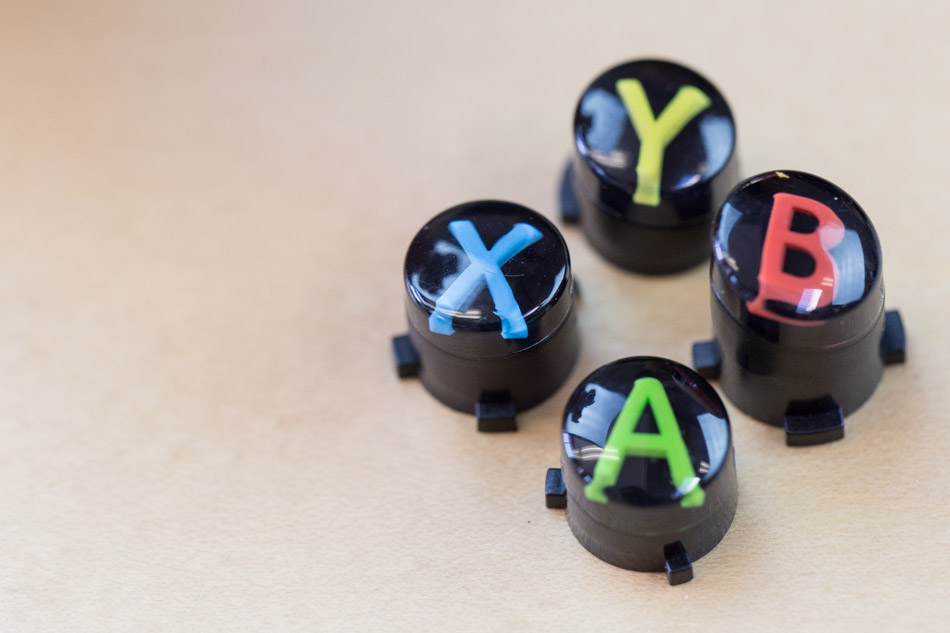
Since the ABXY button tops are partly clear and partly opaque, they were produced by insert mold or two-shot mold. In multi-material molding, plastics need to be compatible for adhesion—these are very likely PC and ABS.
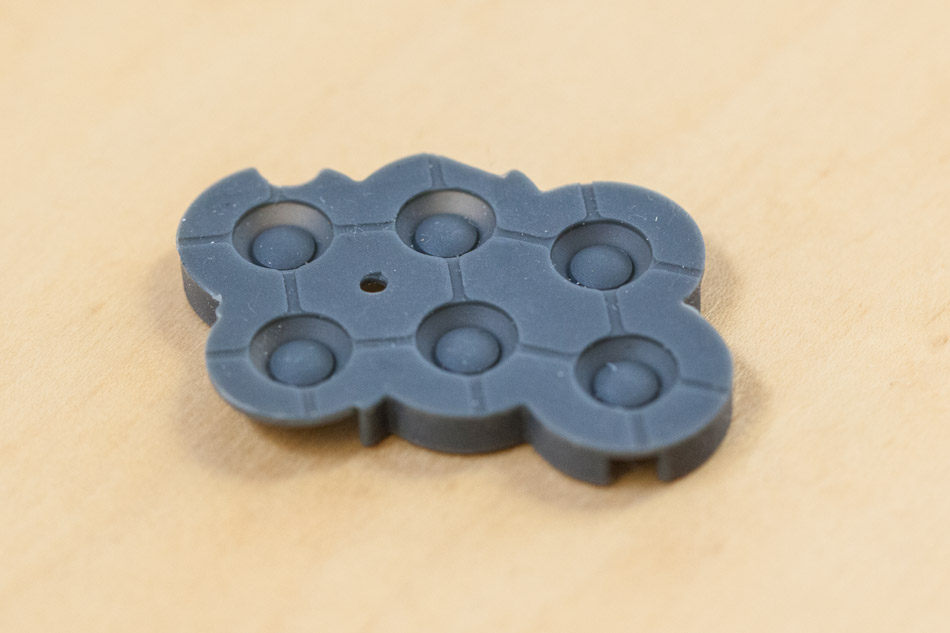
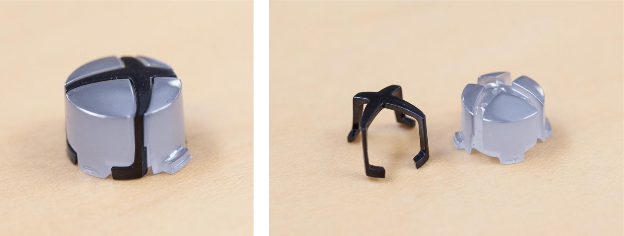
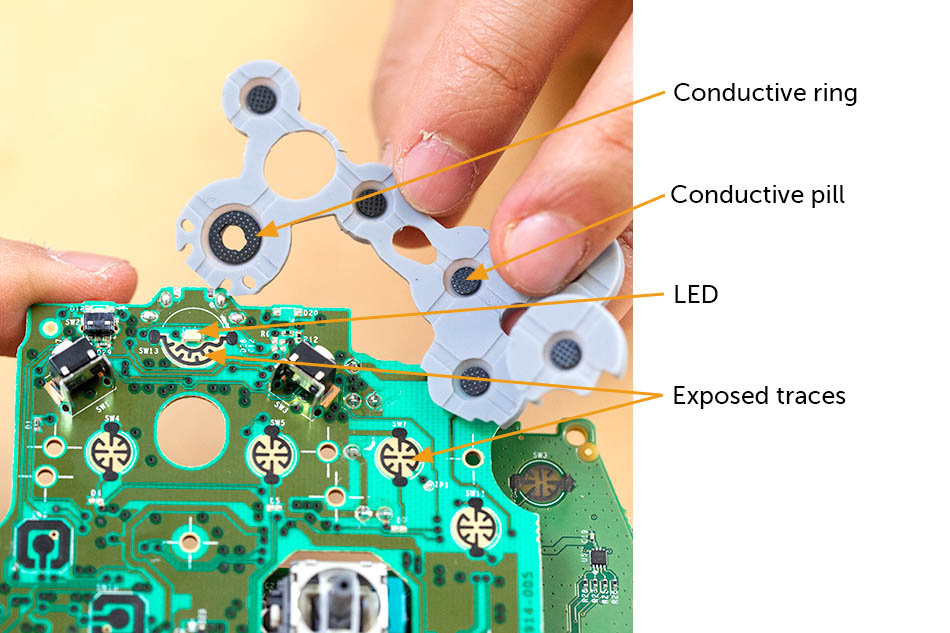
The D-pad (Directional Pad) button is a self contained subassembly. The top cover of the D-pad snaps into a bracket plate (via cantilever hooks), and the two parts sandwich an elastomer keymat. The cone-shaped domes provide spring back force, while the black carbon conductive pills trigger button pushes.
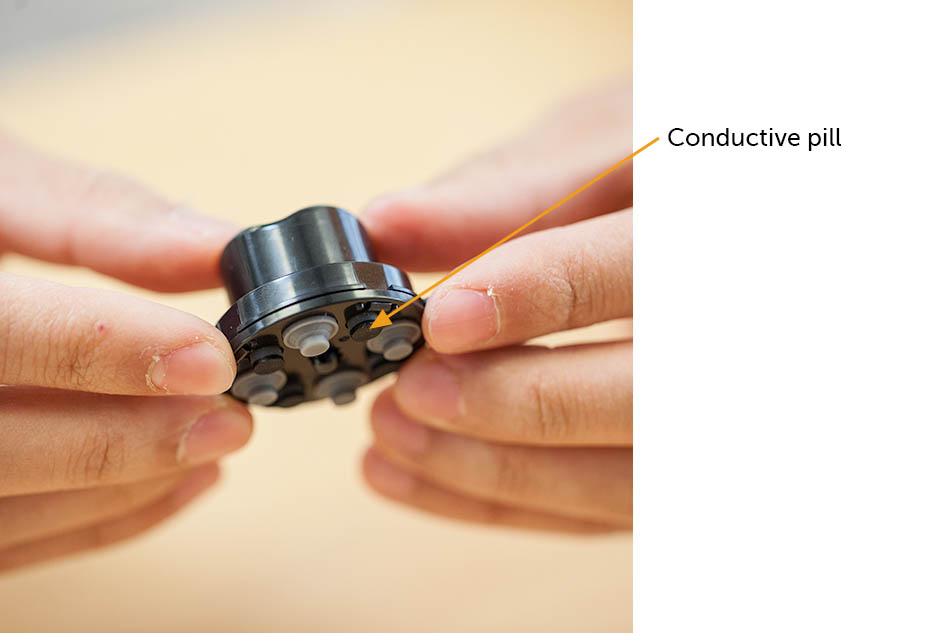
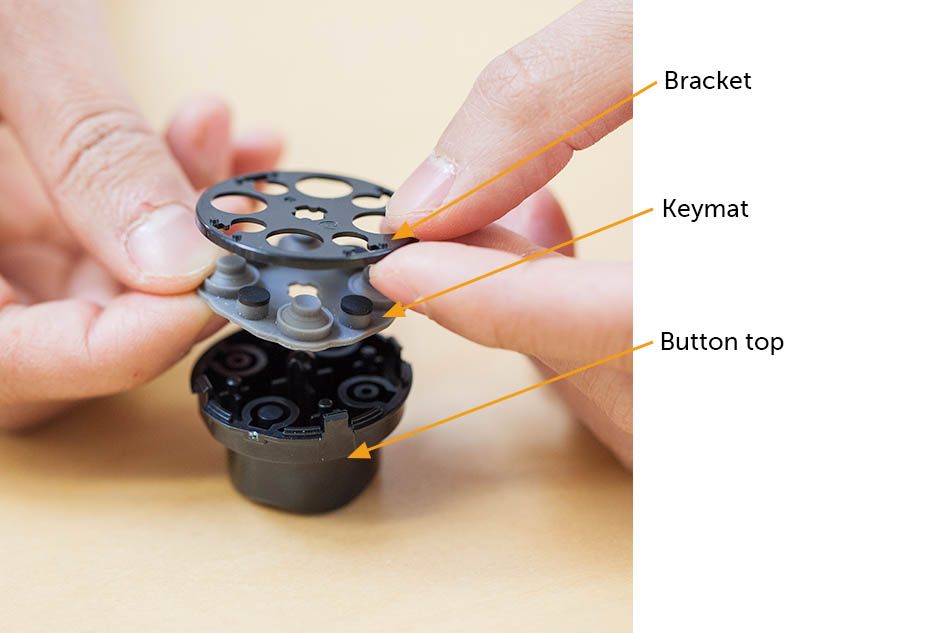
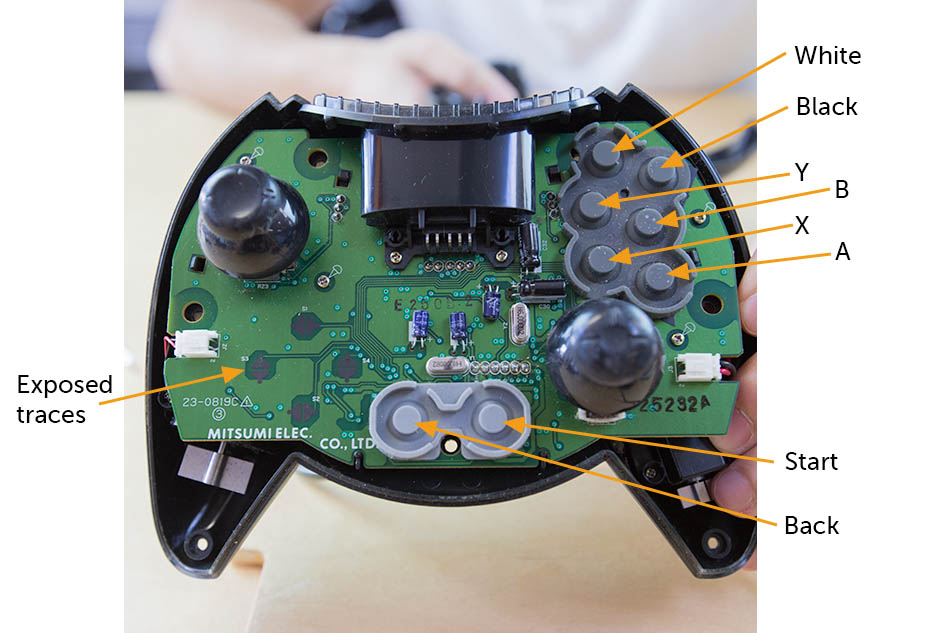
When any one of the conductive pills is depressed and makes contact with the PCB, it shorts the exposed traces, thus registering a button push.
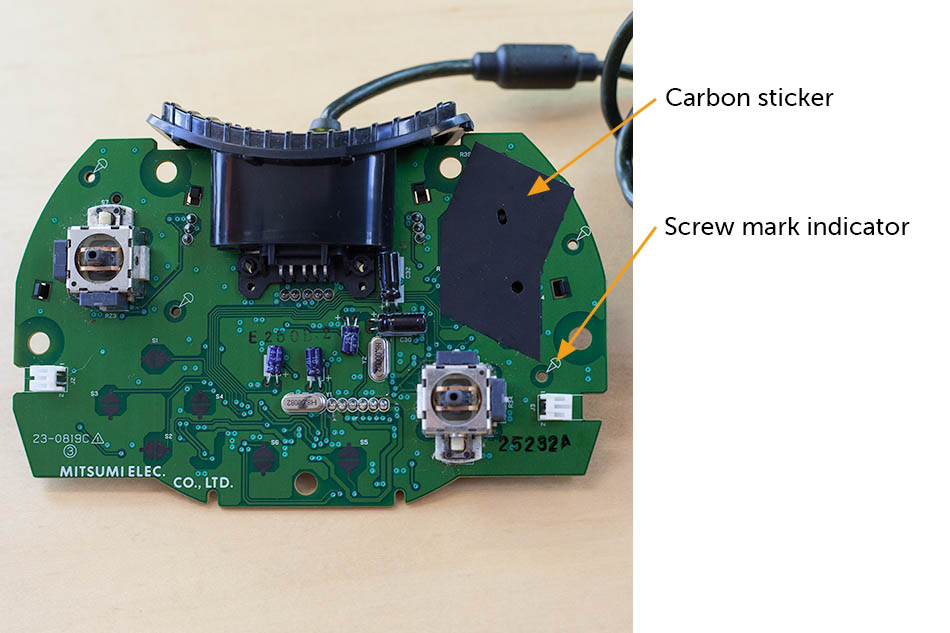
We proceeded to remove the PCBA from the bottom shell and noticed that there are screw icons silk-screened next to all the screw holes—a great design for assembly consideration!
We find it interesting that there is a carbon sticker covering between the PCBA and the keymat. The keymat for the white, black, and ABXY buttons doesn’t actually have conductive pills on the back. Thus, when these buttons are depressed, they push down on the carbon sticker, which then shorts the underlying traces.
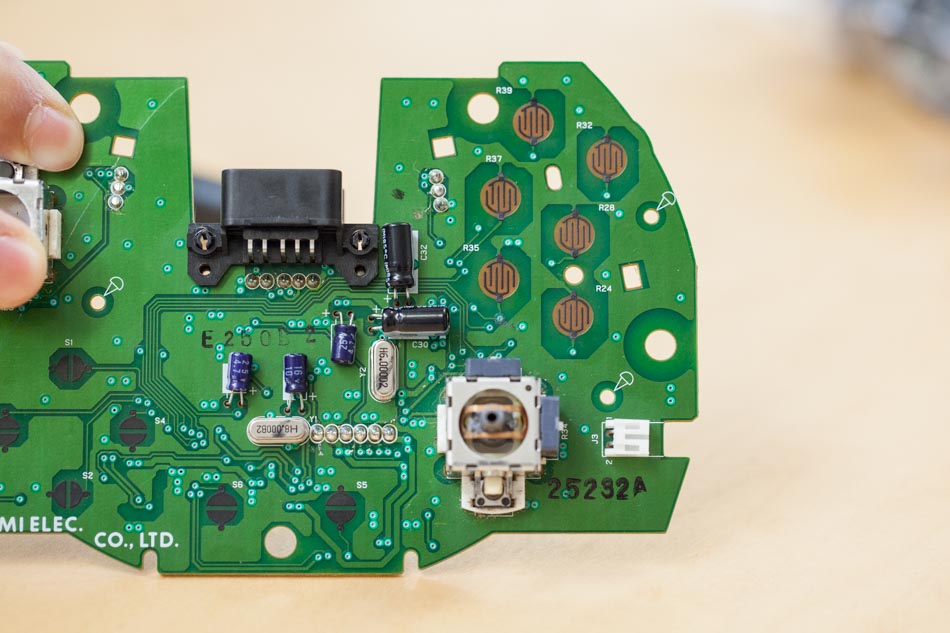
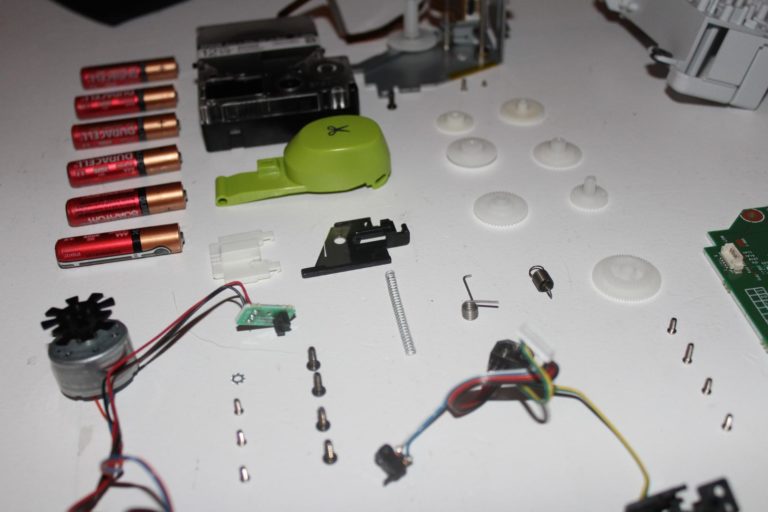
The joystick is the same off-the-shelf component that we found in the Nintendo controller.
Looking at the the base of the bottom enclosure, we have two ERM (Eccentric Rotating Mass) vibration motors. These provide haptic feedback to the player and connect to the PCBA through PH-style connectors. The off-set masses are different sizes, so the player can differentiate between feedback coming from the right and from the left.
For the trigger, we have a compression spring as the spring-back mechanism and a hard stop. A potentiometer is used to register the trigger actuation. Just like the D-pad, the trigger is also a self-contained assembly.
And that’s the Original—easy to disassemble and clearly laid out.
The Xbox One Controller
Now, let’s skip ahead roughly a decade from the original Xbox controller to the Xbox One controller. Contrary to its name, it’s actually generation three, not one…deceptive! While this controller is more streamlined, it’s much more complex in terms of assembly and components.
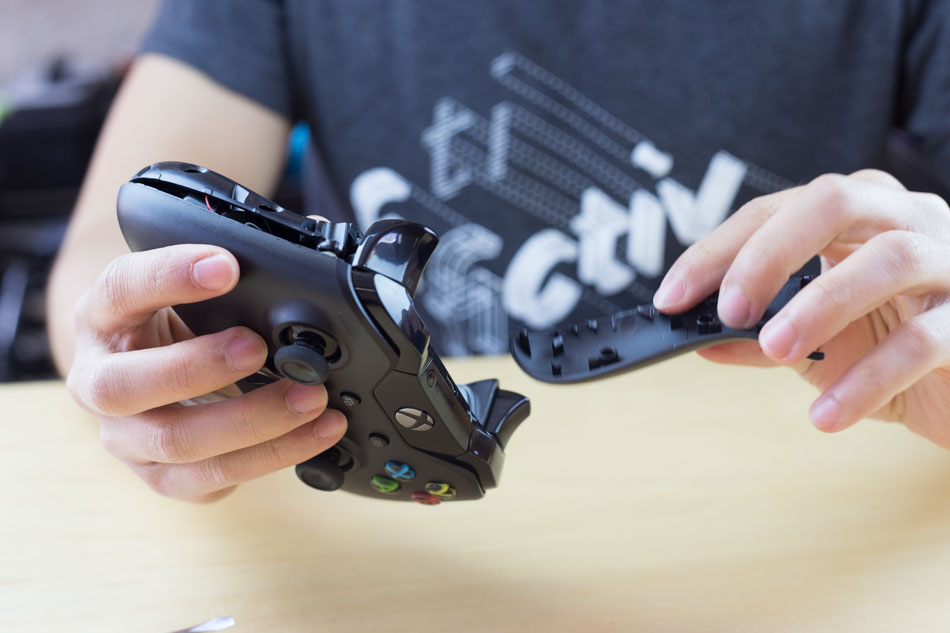
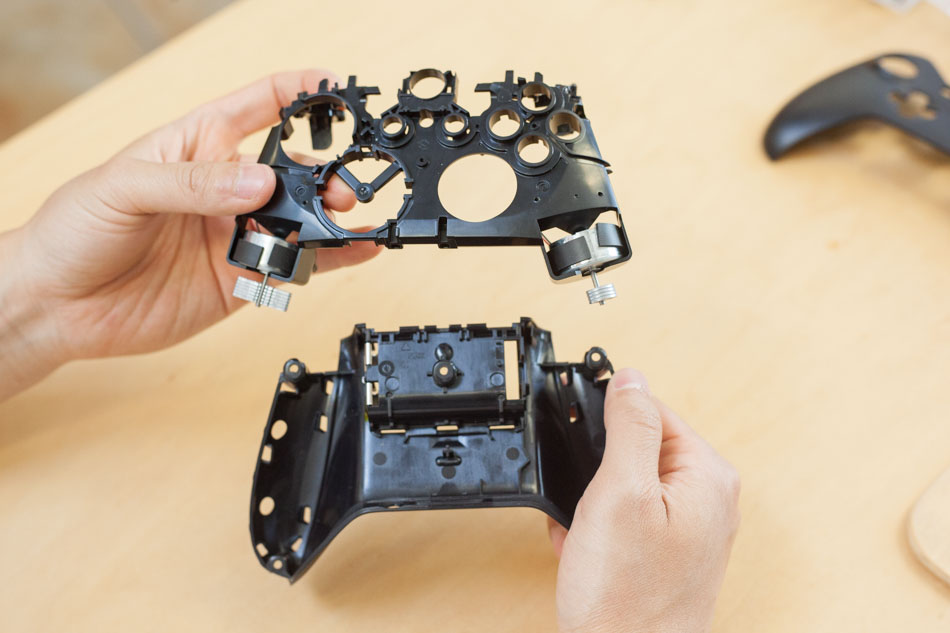
We have top and bottom shells, as well as an internal skeleton. Compared to the Original, there are more more parts that make up the mechanical assembly. We have not only screws, but also snap-fits for assembly features. Great effort went into hiding the screws to make the controller more sleek. In fact, one of the screws was hidden under the sticker of the battery compartment; can’t fool us, though!
Instead of the traditional Phillips head screws, we have torx head screws.
For those three main components, the top and bottom shells are PC/ABS, while the internal skeleton is ABS. The addition of the PC makes the shells more impact-resistant. The tensile strength of PC/ABS is 20% higher than that of pure ABS.

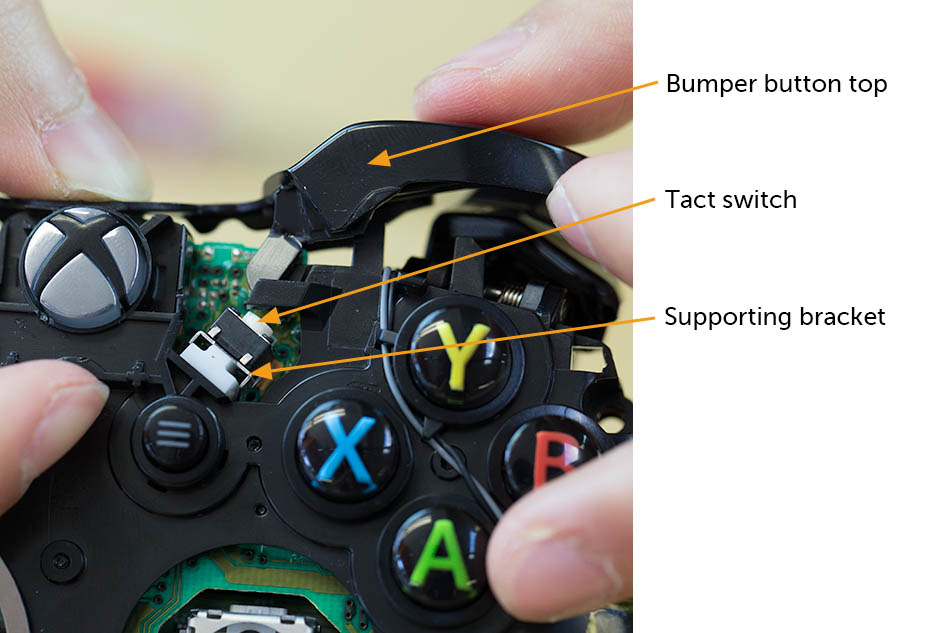
The left and right bumpers are part of the same component. As a result, only one mold cavity is needed to create this component, instead of two. Spring-back is provided by the cantilever connecting the two button tops. These bumpers trigger tact switches that are through-hole soldered to the PCB. The switches have their own bracket to provide extra support.
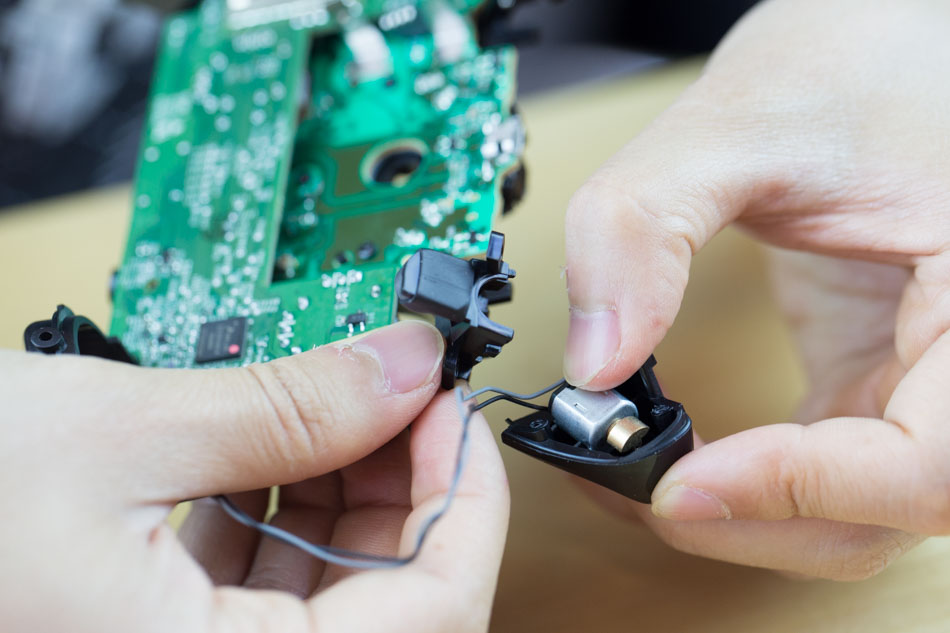
Unlike in the Original Xbox controller, the triggers use a torsion spring for springback.
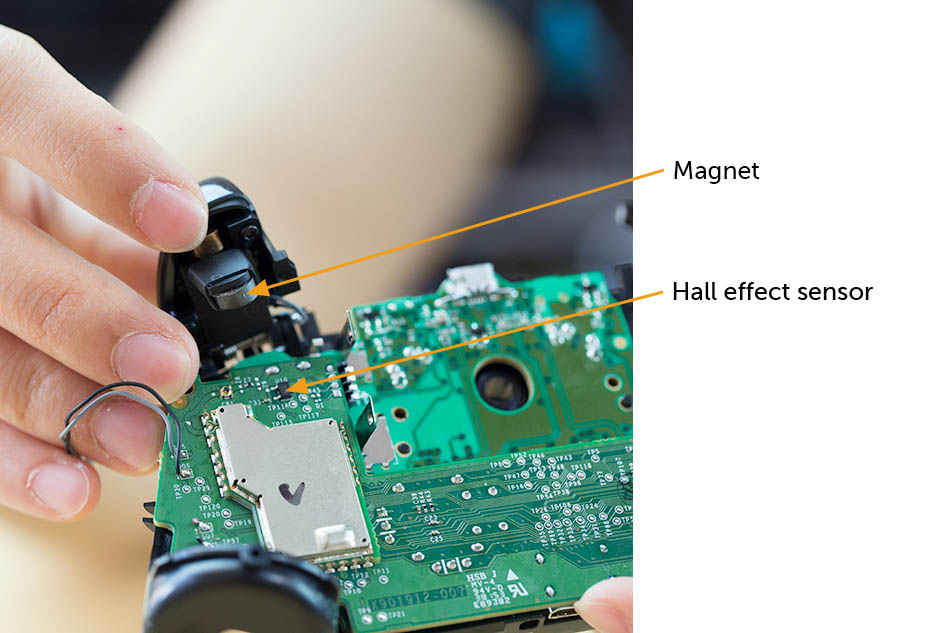
For trigger actuation, there is a magnet under the trigger that interacts with the hall effect sensor on the PCB. When the magnet is brought into the proximity of the trigger, the sensor detects the change in magnetic field and outputs different voltages.
The triggers in the Xbox One controller are also much more sophisticated. They have embedded ERM vibration motors inside for even higher fidelity haptic feedback.
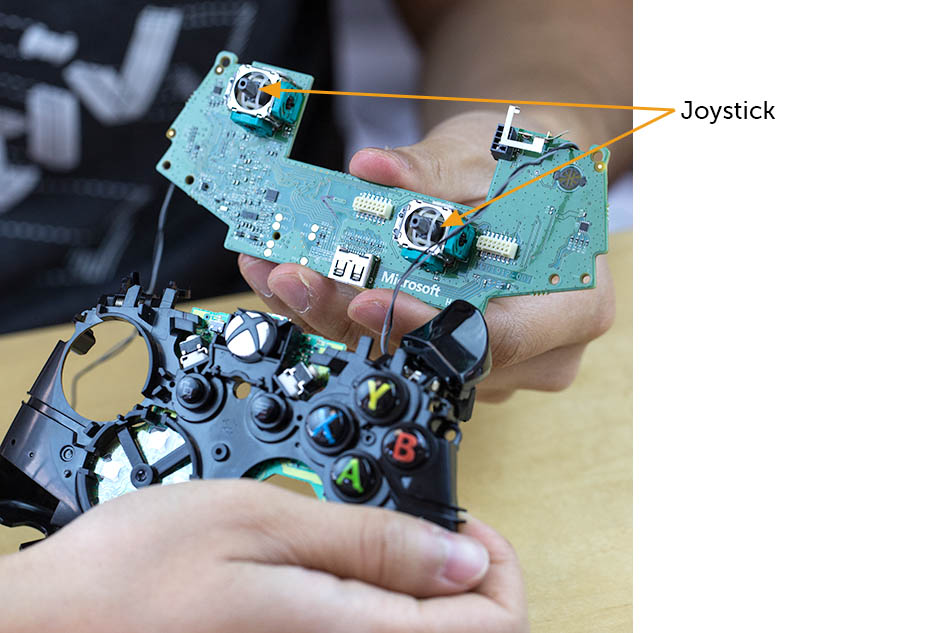
Going back to the joystick, the mechanism is more or less the same as in the Original (and in other game controllers). It clearly works well—no revision needed.
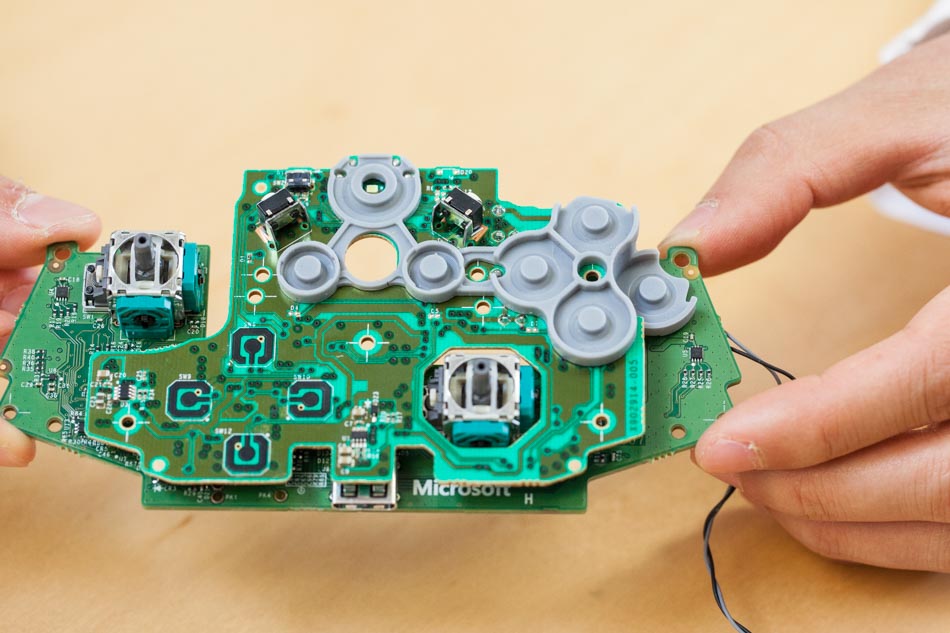
The button mechanics are also similar to the Original. Under the button tops, an elastomer keymat with conductive pills on the back facilitates the switch triggering. All the push buttons share the same keymat (gone are the white and black buttons of the Original). One of the button tops and a portion of the same keymat hangs off the side—since there are two PCBAs stacked on top of each other, that keymat interfaces with the exposed traces of both PCBs.
The Menu and View button are two-shot molded, while the ABXY button tops are now three-shot molded. Fancy!
The XBox button top is pretty neat itself. Instead of being two-shot molded, it is actually a two-part assembly. The base component is a light diffuser, with the top surfaces painted for a metallic appearance.
Beneath the button top is an LED, placed so that the light illuminates the button top. In order to register a button press, the conductive pill is actually a carbon ring that goes around the LED.
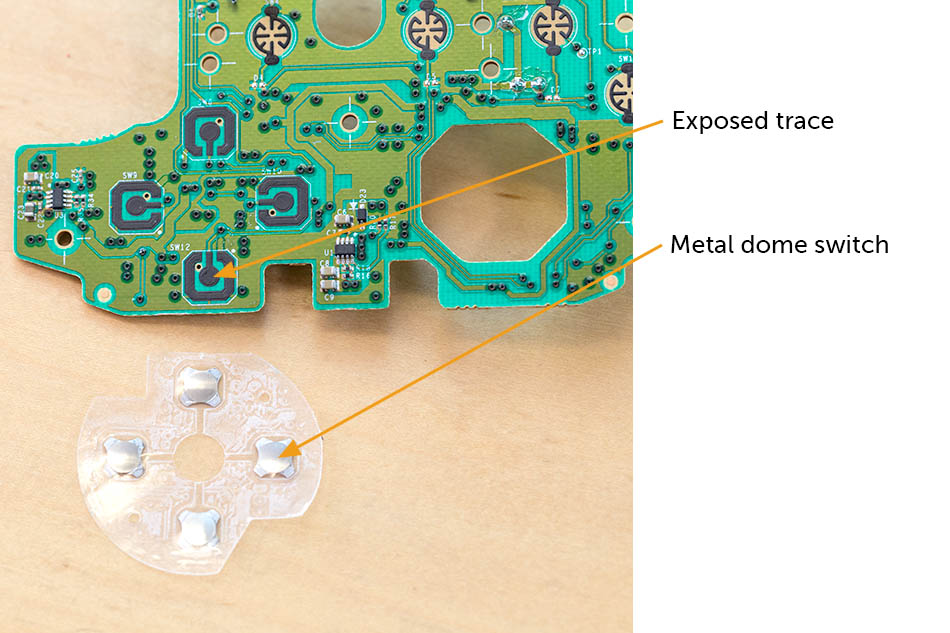
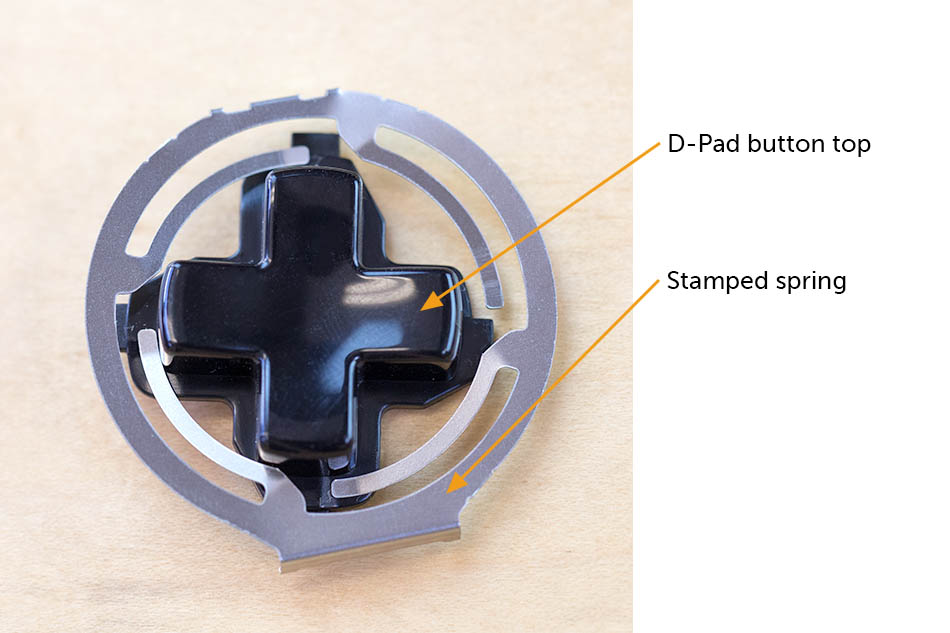
The D-pad controls are also different between the Original and the One. Instead of an assembly incorporating keymats, the D-pad button top triggers metal dome switches that short the carbon traces beneath. The button top is injection molded plastic connected to a stamped sheet metal spring.
The haptic feedback also remains in the handles with similar vibration motors, housed in the middle enclosure. Like in the Original, the offset masses are actually different sizes to also differentiate the feedback.
Main Takeaways
The most significant differences between the Original and the One controllers have to do with their internal features. The Original used several self-contained subassemblies, which are gone in the One. Instead, the components are integrated into the rest of the remote. The self-contained subassembly approach makes it easier to repair and rework, but they did take up more space. To make the controller more sleek, sacrifices must be made.
While there are fewer buttons on the latest generation, the latest one also has greater variation of switches. For the triggers, torsion springs are used, which feel softer and are more compact. The D-pad uses a different button press mechanisms, resulting in a different tactile feel.
Overall, while many mechanisms and components evolved, the overall architecture remained the same. It’s definitely an evolved design, not a complete re-design.